We created a garden outside. The children began looking for fairies after we read the book, The Tiptoe Guide to Tracking Fairies. The children began talking about the fairies and looking for fairies in our garden.
We placed items in the dramatic play area and block center. We placed 1 foot tree sections, wood cookies, small furniture, stones, and driftwood. The children wanted to create a fairy house. They created plan for the house. They sketched what they thought was needed for a fairy house. We found items around the room that the fairies would like and used them in the structure. The children were concerned that the fairies would not find the house. One child said, "We need fairy dust, they can follow it." We created fairy dust. The children sprinkled the fairy dust from the garden to house. Another child thought we needed to create food that the fairies would like. They found flowers, sparkly stones, and added fairy dust to their creations. They continued trying different ideas that would bring the fairies to house. They began to add music to the
block area because fairies like music. They began to become frustrated because the fairies had not found our room. One child came up with the idea that we would have to catch the fairies and bring them to the house. The children took the idea and discussed different ways to catch the fairies. One idea was to make a trap. They sketched their ideas. One idea was a box with food in it . Another idea was a net and we could sneak up on them and throw the net over them. We created a net with yarn. We searched for the fairies everyday but they eluded capture. Through the idea of the net another child said, "We need something they like." We kept discussing different ideas.
I brought in an embroidery hoop and asked "How can we use this to catch the fairies?" The children still liked the net idea. We wrapped rope around the hoop. We took it outside to the garden. The children found grass and flowers to put on the loom. We brought it in and they finished weaving the flowers and grass into the hoop. We discussed how the hoop would catch the fairies. The children thought we should put it outside and leave it over night. One child said, "They will fly into the hoop because it's pretty." We placed the hoop in the garden. The children checked the hoop everyday but no fairies. Finally, I posed the question, "Do you think it is very nice to trap and trick the fairies?" Several children shook their heads. I asked, "What do we do in class when we want a friend to play with us?" One child said, "Ask them." I said, "How could we ask the fairies to come play with us?" Some replies were, "We can yell in the garden. We can ask them nicely. We can write to them." Teacher asked, "What would we write." The children wrote different letters over the week and left them in the garden. The next week we came into the room and there was fairy dust all around the fairy house. The children became excited. They said, "Fairies Came." Teacher asked, "How do you know it was fairies?" The children pointed and said, "Fairy dust." We discussed if the notes were helping. The children shook their heads yes. They discussed ideas about how they could show the fairies that our classroom was safe and we wanted them there. One child said, "Invite them to a party." The children set a date and wrote invitations to the fairies to come to our party. The children planned a party. On the day of the party, guess who showed up? Fairies!!!!
The children played with the fairies for several months.
The question the teachers discussed though out the process was how many realistic things to introduce into their play. We wanted them to use their imagination. What concepts were the children trying to figure out during the process? Did the children understand that tricking the fairies was unkind and how they changed their techniques when that did not work.
Friday, March 29, 2013
Tuesday, March 26, 2013
Ramps and Pathways
The car study was in full force. The children began looking at roads and bridges in different types of books. They were interested in wheels going down the ramps in the block center. We decided to bring in different materials for the children to investigate ramps and pathways. My co-teacher found an awesome book published through NAEYC called Ramps and Pathways.
Then I posed the question, "Do you think different surfaces will make the cars go faster?" The children looked through the cabinets and found different materials to but on the ramps and explored which made the car go faster or slower. They found out that the ramp with tinfoil was the best for making cars go faster. They used stop watches and measured how far the cars went on the different surfaces. We also used foam mats, sandpaper, cellophane, and wax paper.
Ramps on the Playground
Ramps & Pathways: A Constructivist Approach to Physics with Young Children
Author(s):
Rheta DeVries & Christina Sales
Item #: 352
I went on Pinterest and found ideas to bring in as well. We went to lumber store and bought the molding and guttering to cut into different links. The lumber store gave us carpet tubes to use as tunnels. We brought in marbles, balls, and wheels for the children to explore ramps and pathways.
The children found out different ways to keep the marble
on the track. They stacked up blocks on either side of the tracks
They put the molding inside tunnels. They discovered that a gradual decline was better than a steep one. They had the marbles dropping from one track to another track without them falling off the pathway. They discovered if there was nothing to stop the marbles at the end of the tunnel they would have to go all the way across the room to find their marbles.
My husband (my best resource) gave me some thin 4 inch boards to use as ramps. We worked with the ramps for a couple of days. I asked a question in morning meeting, "Do you think other things in the room would roll down the ramps?" We went in search of different objects they thought would roll down the ramps.
Then I posed the question, "Do you think different surfaces will make the cars go faster?" The children looked through the cabinets and found different materials to but on the ramps and explored which made the car go faster or slower. They found out that the ramp with tinfoil was the best for making cars go faster. They used stop watches and measured how far the cars went on the different surfaces. We also used foam mats, sandpaper, cellophane, and wax paper.
Ramps on the Playground
Sunday, March 24, 2013
Study of cars
One morning the children were sitting in morning meeting. They were acting uninterested in the topic we had been studying. I asked, "What do you want to learn about." The children's body language changed and we began to discuss different topics we could investigate. The children were all saying something about cars or race cars. We changed our block center and added hub caps, wheels, grill from a old van, keys, mirrors, and steering wheel. We also added different types of ramps and tunnels.
We took a field trip to the parking lot. We observed and sketched the cars in the parking lot. A parent brought a car up to our school. They let the children get inside, under, opened the hood and trunk so that the children could sketch different parts of the car.
The children took their sketches inside and began developing plans on building a car in blocks. The children discussed building the car during reflection. They all agreed we needed tools to work on the car. I went and found an old socket set in my garage that was lying around and brought it in to the block center.
I brought in a dryer card board box in and the children add white paper to the box. They began drawing the different car parts. I cut the windows out with a box cutter on the lines that they drew. They used recyclable parts to add to the car. The children would get in and drive their car.
They children were drawing, painting, making clay cars.
We decided to bring in stones and tiles so that the children could create a mosaic. We looked at different books that had mosaics in them and decided to try our first mosaic. The children that wanted to work on the committee for the mosaic drew a car and they voted on the best sketch. That child drew their sketch onto the canvas. Then the committee decided what color they wanted the car, background, and other details.
The children made comments while working on the canvas.
"It makes a pattern."
Picked up clear tiles and said, "Look these will be the windows, you can see through them and that's important for windows."
"We need hubcaps and antenna." They went and found objects around the room.
Once the stones and tiles were on the canvas. One child said, "There is space around the stones." We went and looked in our art cabinet and the child pointed and said, "The green sand. It matches the stones. It will look best."
This brought together our community and each child was allowed to use their own language to learn.
This study proved to me how important following children's interest can lead to learning and fun. Sometimes we just need to ask!!
“Look it makes a pattern.”
found clear
tiles and
said, “These will make the
Window.”
Saturday, March 23, 2013
Creating Community
Creating Community in Our Rooms
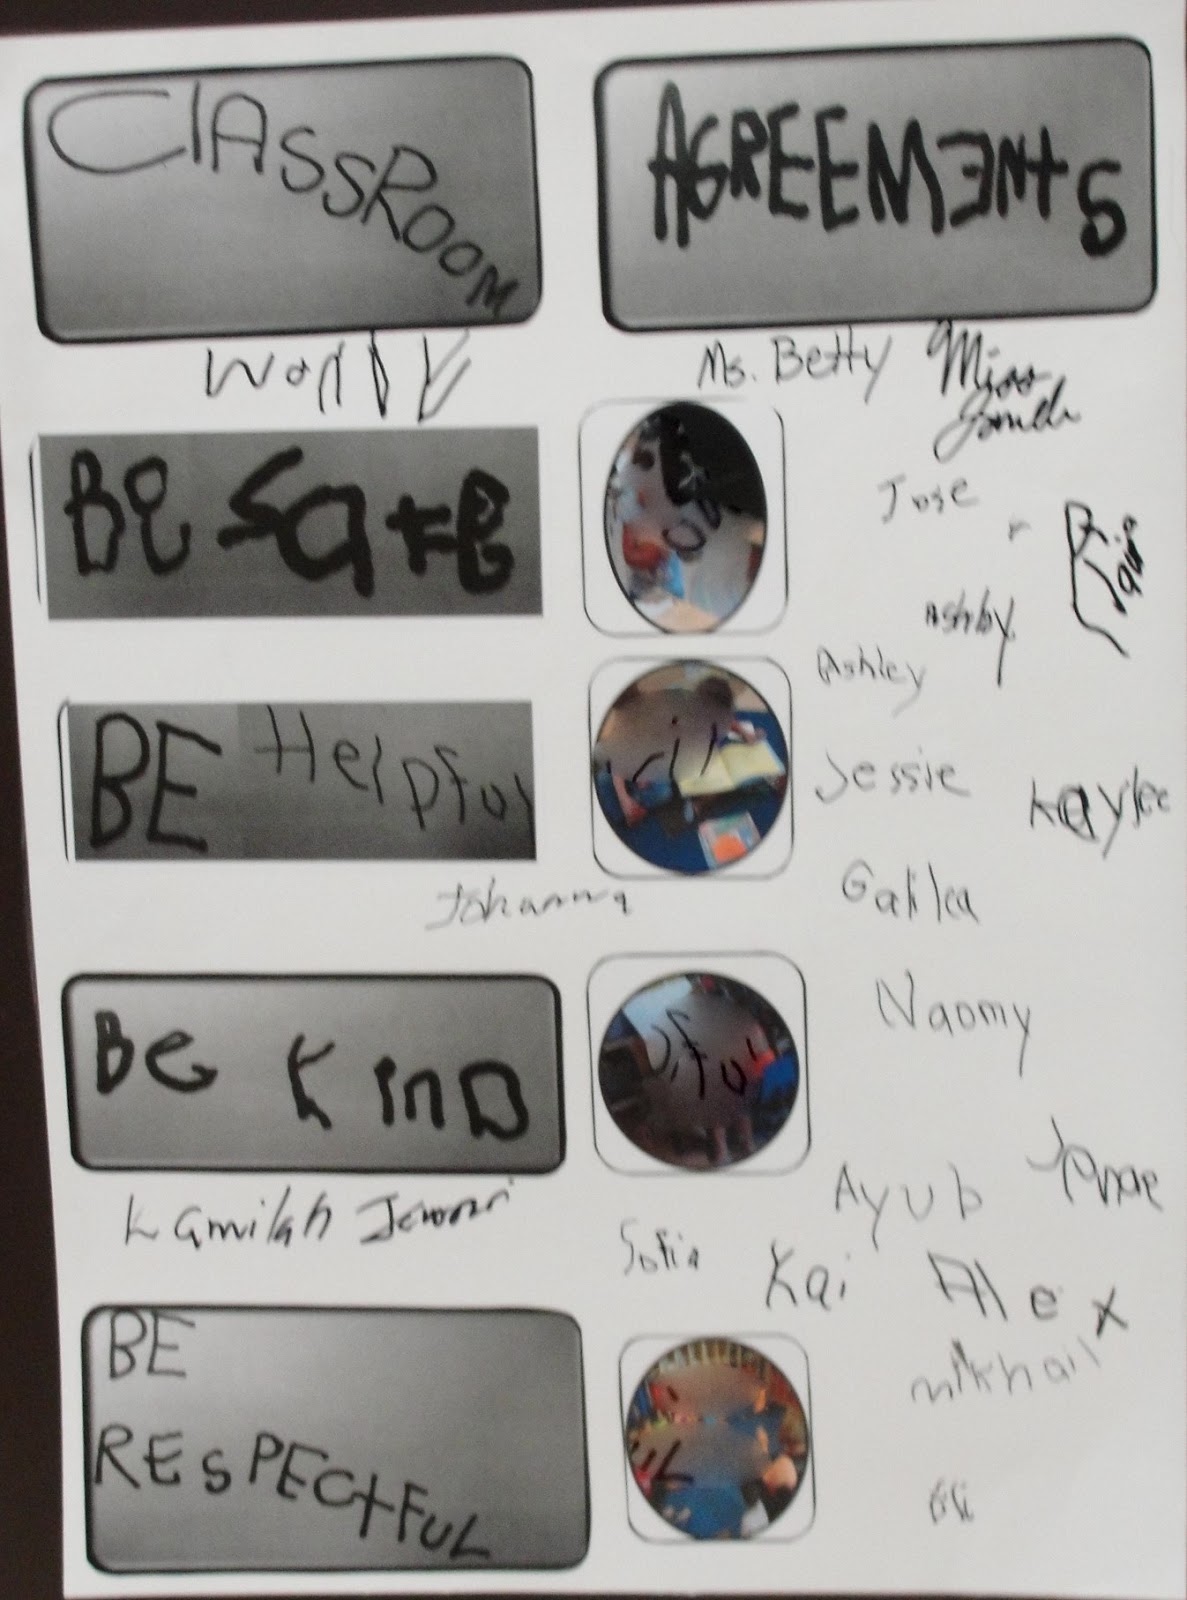
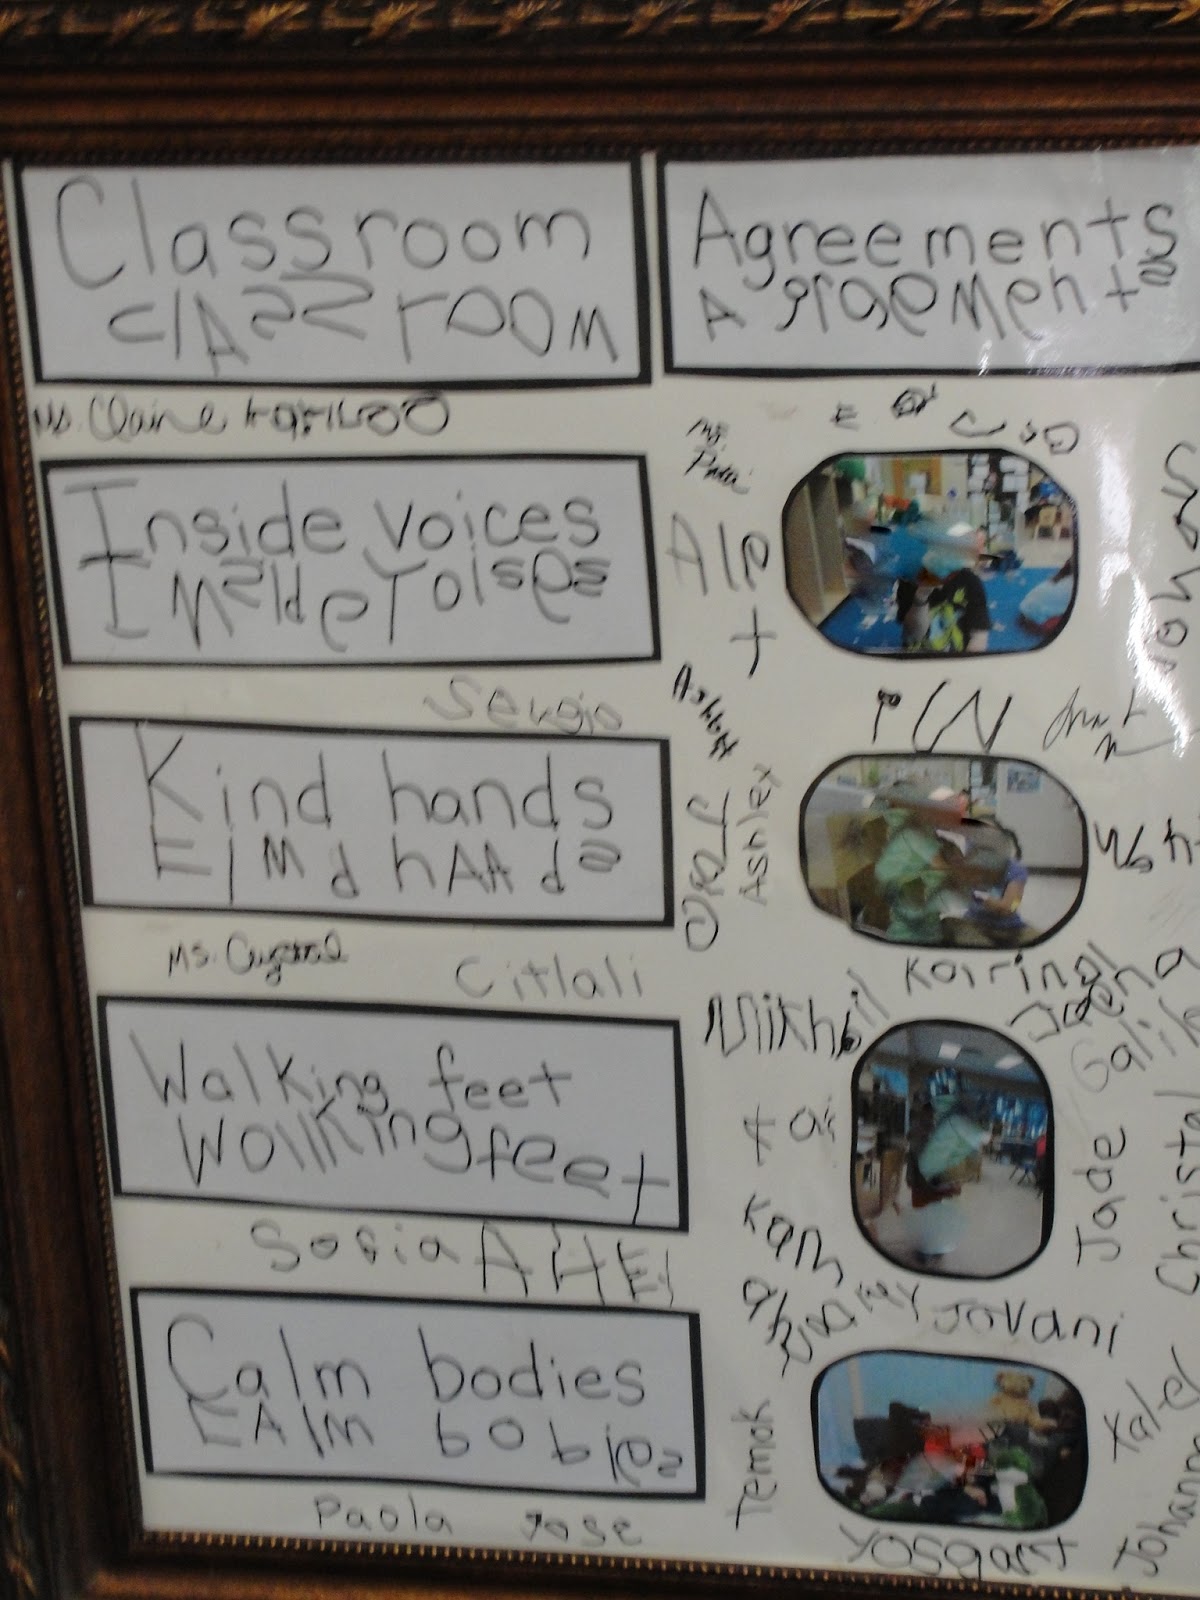
We began the year by developing community of learners. We started with our Morning Meeting time. We follow responsive classrooms morning meeting structure: Greeting, Share, Activity, and Message. The time allows for the teachers and children to get to know each other and show that every child is important in our classrooms. We began the year by discussing our Classroom Agreements. The process was to allow everyone a voice about our agreements and then categorizing the agreements into 4 agreements that we could all follow. Once we narrowed down the agreements to 4 we created a book of pictures that showed how to follow them. The children choose one photo for each agreement and the children wrote out the agreements. We posted the agreements on a poster. Every child and teacher signed the poster. This is a crucial part of our agreements because every child believes that their name is important and that relates that the agreements are important. We put them in frames so that the children know how important they are to the classroom.
Job Boards
Our Job Boards allow the children to take part in every aspect of our classroom. It provides the child with self-esteem and feeling of competence to be able to take care of our room. The children and teachers discussed what each classroom needed for jobs. The children took part in the decision making process is valuable because then they begin to take ownership of the room. Our jobs: teacher assistant, greeter, weather reporter, daily reporter, kindness reporter, waiters, electrician, veterinarian, Gardner, star helper, sanitation worker, and vacation. One of the children came up with vacation because he said, "Do I have to work everyday."
We try to use things in our classroom that are more homelike and durable, Just like the frames we use we had a resource for old bi-fold
closet doors. Home Depot or other building supply stores have samples of laminate. We used the large laminate pieces as the jobs and used the small laminate pieces as the name plates. I hate Velcro because I am always having to redo it. We chose to use cup holder hooks, these work really well plus it is a great fine motor tool.
We use the shutters in between our rooms with the hooks and shutters for a room management tool. We work in a DHS and research based school that has to do yearly ECERS/Class assessments. We had to come up with a way for the children to use both rooms but I needed a visual so that I knew which children were in each class. This works well.
Daily Schedule
We also have the children help with the daily schedule. When we began the year, our outside time was in the middle of exploration time. The teachers and children were upset each day when we had to go outside in the middle, so we went and talked with other teachers and management and changed the time more to the end of the day. We created a schedule that we could move around and try out different times for our daily activities. When we were finished the children took the pictures of our day and wrote out our schedule. Sorry I don't have a current picture but looks the same as the example but in child's writing. The children believed that they have a voice in their lives because the teachers involve them in the planning process.
Child Portfolios, Mailboxes, Class to Home Communication
The children also are involved in their portfolios. They are allowed to put papers and pictures in their portfolios. They can also choose to take home if they do not want it in the portfolio. My husband made our mailboxes. Each child has their journal and can keep work there if still working on. They use the mailboxes to write notes to teachers and other children. The children can put work in their folders to take home and teachers use them for communication.
Daily Reporter
We work with 3-5 year old. I do not believe traditional calendar time is age appropriate but I do have a child directed calendar in my classroom. We were in Reflection time and one of my children said, "We need to write what we did today," a light bulb went on in my head. I had seen another teacher use post it notes and in another Reggio classes I had observed used calendars with their today we's. I came up with the job, daily reporter. In another classroom at our school a teacher had made a calendar out of an old frame and clothes pins. I had the children write the numbers on cards, days of the week, and the month. I found a big frame for a $1. The children helped to make the calendar. We assembled the calendar and hung it on the wall. The daily reporters job is to write down what the other children say during reflection. Then they hang the piece of paper on the calendar. This is the job that my children argue over every day.
Friday, March 22, 2013
Image of the child
Image of Child and Families
Family Boards
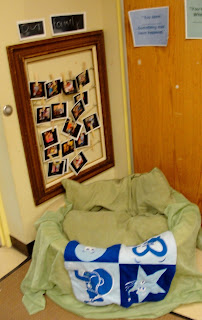
The family boards are placed by our safe zone so that when a child needs to have a picture of their family it is readily available. We created our family board using a old picture frame and drilled holes in the side for small eye bolts. Then we string rope and tie it off. The pictures are hung using clothes pins. This allows for the child to get their picture when they want it. Tip... Make several copies!!!!
We use frames a lot in our classroom. They are easy to use and mount on walls. They are a cheap resource. You can find them for a couple of dollars at garage sales, flea markets, or family.
Identity Boards
Image of the Child
The first few weeks we began creating self portrait. We read the book ish... and began drawing. This book really helps children that it is the process and not the product that matters. We moved onto symmetry drawings of their faces. We take their photos and cut them in half and they draw the other half of their face. Then we drew our self-portraits. I scanned the portraits and created a document for the identity boards. The children wrote their names and I scanned them into the computer. I used PowerPoint to create the board. The top half is their photo and self portrait and the bottom has their name that they wrote. On the other side of the lattice is their family photos. Reggio has documentation that explains the process and importance of identity panels.We have all documentation in English and Spanish to respect the children's home language.
Unique Child Traditions
The school that I work for we do not celebrate birthdays or holidays in respect for our families. However becoming another year older is a special day in our community. The child chooses the books for reading time, is allowed to choose favorite job, and moves their name card under our graph of ages in the classroom. We create a unique child panel.
This year our class will
celebrate each child in a special way. We will create a panel for each child as
they become a year older. The child then gets to select friends to help him or
her create a Unique Child Panel. In creating the Panel, the child decides on
the materials and colors of materials that reflect the things they like. Once
complete, the child’s panel will be hung for their friends and family to view
all year. When the school year is
finished they can take it home as a remembrance of their year in our class. We created our panels in the Princess and Knight class on canvas and put the child's picture on the back. The dragon class used stick wreaths and added ribbon,feather, and beads. The teachers put the picture of the child in the middle of the wreath.