Image of Child and Families

Family Boards
.jpg)
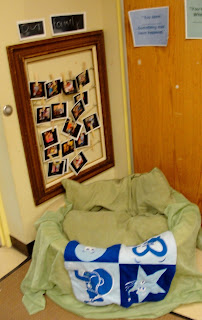
The family boards are placed by our safe zone so that when a child needs to have a picture of their family it is readily available. We created our family board using a old picture frame and drilled holes in the side for small eye bolts. Then we string rope and tie it off. The pictures are hung using clothes pins. This allows for the child to get their picture when they want it. Tip... Make several copies!!!!
We use frames a lot in our classroom. They are easy to use and mount on walls. They are a cheap resource. You can find them for a couple of dollars at garage sales, flea markets, or family.
Identity Boards
Image of the Child
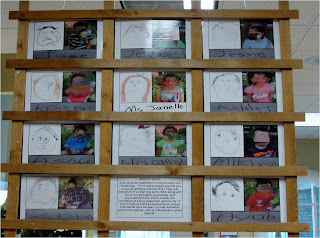
 The first few weeks we began creating self portrait. We read the book ish... and began drawing. This book really helps children that it is the process and not the product that matters. We moved onto symmetry drawings of their faces. We take their photos and cut them in half and they draw the other half of their face. Then we drew our self-portraits. I scanned the portraits and created a document for the identity boards. The children wrote their names and I scanned them into the computer. I used PowerPoint to create the board. The top half is their photo and self portrait and the bottom has their name that they wrote. On the other side of the lattice is their family photos. Reggio has documentation that explains the process and importance of identity panels.We have all documentation in English and Spanish to respect the children's home language.
Unique Child Traditions
The school that I work for we do not celebrate birthdays or holidays in respect for our families. However becoming another year older is a special day in our community. The child chooses the books for reading time, is allowed to choose favorite job, and moves their name card under our graph of ages in the classroom. We create a unique child panel.
This year our class will
celebrate each child in a special way. We will create a panel for each child as
they become a year older. The child then gets to select friends to help him or
her create a Unique Child Panel. In creating the Panel, the child decides on
the materials and colors of materials that reflect the things they like. Once
complete, the child’s panel will be hung for their friends and family to view
all year. When the school year is
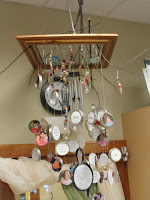
finished they can take it home as a remembrance of their year in our class. We created our panels in the Princess and Knight class on canvas and put the child's picture on the back. The dragon class used stick wreaths and added ribbon,feather, and beads. The teachers put the picture of the child in the middle of the wreath.
I wanted to show how we promote the image of each child and their families in our classrooms. The child and families love to see their pictures though out our room.


No comments:
Post a Comment